Have you ever wished managing your finances could be simpler, faster, and more convenient, all from the palm of your hand? In today’s digital age, mobile payments are no longer a luxury, they’re a necessity.
They’ve revolutionized how we handle transactions, offering a seamless and secure alternative to traditional methods.
Among the many mobile payment solutions available, the JumiaPay app has emerged as a particularly user-friendly and versatile platform, especially for those who frequently use the Jumia ecosystem.
If you’re wondering how to use the JumiaPay app on your mobile device, you’ve come to the right place. This comprehensive guide is designed to walk you through everything you need to know, from the initial setup to mastering all its features.
Whether you’re an everyday online shopper familiar with the Jumia platform or completely new to the world of mobile payments, this article will provide clear, step-by-step instructions on how to use the JumiaPay app effectively.
We’ll explore everything from downloading and installing the app to funding your wallet, making various types of payments, managing your transaction history, and understanding the security measures in place to protect your financial information.
Think of the JumiaPay app as your digital wallet, a convenient hub for managing various financial tasks. It’s not just about paying for items you buy on Jumia; it’s a multi-functional tool that can simplify many aspects of your financial life.
Perhaps you’re curious about how to use the JumiaPay app for everyday transactions? Maybe you’ve heard about the JumiaPay app and its benefits but haven’t had the chance to explore it fully.
This guide aims to answer all your questions and empower you to take full advantage of this powerful mobile payment solution. We’ll delve into the specifics of how to use the JumiaPay app on both Android and iOS devices, ensuring that no matter what type of smartphone you have, you can easily navigate and utilize its features.
We’ll cover how to use the JumiaPay app to pay bills, purchase airtime, and even send money to friends and family. So, if you’re looking to streamline your financial activities and experience the convenience of mobile payments, keep reading.
This article is your complete resource for mastering the JumiaPay app and unlocking a smoother, more efficient financial experience. We’ll show you exactly how to use the JumiaPay app to make your life easier.
Table of Contents
Getting Started with JumiaPay
Here’s how to get started with JumiaPay app:
Downloading the App
The first step to enjoying the convenience of JumiaPay is downloading and installing the app on your mobile device. The process is straightforward and similar for both Android and iOS users:
- For Android Users: Open the Google Play Store on your Android device. In the search bar, type “JumiaPay” and press enter. Locate the official JumiaPay app from Jumia and tap “Install.” Once the download is complete, tap “Open” to launch the app.
- For iOS Users: Open the App Store on your iPhone or iPad. Search for “JumiaPay” using the search bar. Find the official JumiaPay app and tap “Get,” followed by “Install.” You may be prompted to enter your Apple ID password or use Touch ID/Face ID to confirm the installation. After installation, tap “Open” to launch the app.
Ensure you download the app from the official app stores to avoid downloading counterfeit or malicious applications.
Once downloaded, open the app to begin the registration process.
Creating an Account
After installing the JumiaPay app, you’ll need to create an account to start using its features. Here’s how:
- Open the App: Launch the JumiaPay app on your mobile device.
- Sign Up: On the welcome screen, look for the “Sign Up” or “Register” option and tap it.
- Provide Information: You’ll be asked to provide some personal information, such as your phone number, email address, and a secure password. Make sure to use a valid phone number as it will be used for verification.
- Verification: JumiaPay will send a verification code to your phone number via SMS. Enter this code in the app to verify your account.
- Profile Setup (Optional): After verification, you might be prompted to complete your profile by adding details like your name and other relevant information. This step is usually optional but recommended for a more personalized experience.
Navigating the JumiaPay App
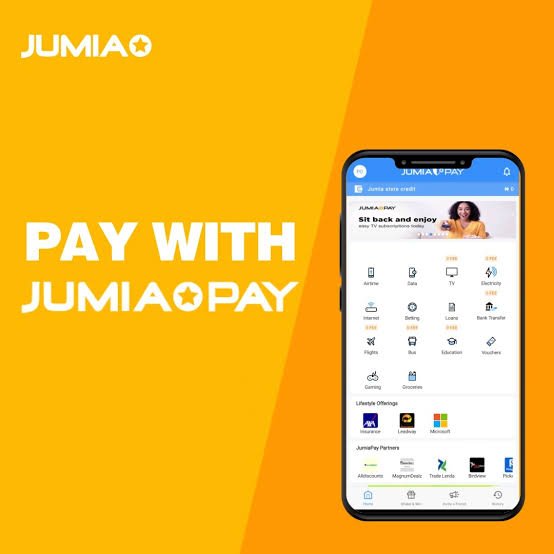
Once you have successfully registered and logged into the JumiaPay app, you will encounter a user-friendly interface designed for easy navigation. Here are some key features of the app:
- Home Screen: This is where you can see various services offered by JumiaPay, such as shopping categories, bill payments, and promotions.
- Menu Bar: Access different sections of the app including Transactions, Wallet, Profile, and Settings.
- Search Functionality: Quickly find products or services by using the search bar at the top of the home screen.

Related: A Step-by-Step Guide on How to Use the Bankly App
How to Make Payments Using JumiaPay
Making payments through the JumiaPay app is one of its main functionalities. Here’s a step-by-step guide on how to do it:
1. Shopping on Jumia
- Start by browsing through products on the Jumia website or app.
- Add items you wish to purchase to your cart.
- When ready, proceed to checkout.
2. Choosing Payment Method
At checkout, select JumiaPay as your payment method. You have two primary options for payment:
Debit/Credit Card Payment:
- Select “Card Payment.”
- Enter your card details (number, expiration date, CVV).
- Confirm payment by entering any OTP (One-Time Password) sent by your bank for security verification.
Bank Transfer:
- Choose “Bank Transfer” as your payment option.
- Input your bank account details (account number and name).
- Follow prompts to complete the transaction.
After confirming your payment method, review your order details and click on “Make Payment.”
Adding Money to Your JumiaPay Wallet
If you prefer using a wallet for quicker transactions in future purchases, here’s how to add money to your JumiaPay wallet:
- Open the app and navigate to “Wallet.”
- Click on “Add Money.”
- Choose a funding method (bank transfer or card).
- Enter the amount you wish to deposit and confirm with your payment method.
Your funds will be available in your wallet immediately after a successful transaction.
Managing Your Transactions
Keeping track of your transactions is crucial for budgeting and ensuring all payments are accounted for. Here’s how you can manage them within the JumiaPay app:
Viewing Transaction History
To view past transactions:
- Go to “Transactions” from the menu bar.
- You’ll see a list of all completed transactions along with their statuses (successful or pending).
Clicking on individual transactions will provide more detailed information including date, amount, and merchant details.
Requesting Refunds
If you encounter issues with a transaction:
- Navigate back to “Transactions.”
- Select the transaction in question and look for an option that says “Request Refund.”
- Follow prompts provided by JumiaPay for processing refunds as necessary.

Related: How to Use Paystack: Pay With Mobile Money
Security Features of JumiaPay
Security is paramount in online transactions. The JumiaPay app employs several measures to protect users:
- SSL Encryption: All data transmitted through the app is encrypted for safety.
- Two-Factor Authentication: Users receive OTPs via SMS or email for added security during transactions.
Always ensure that you keep your login credentials confidential and report any suspicious activity immediately.
Conclusion
The JumiaPay app offers a convenient and secure way to manage your finances and make various transactions on your mobile device.
By following the steps outlined in this guide, you can easily set up your account, fund your wallet, and start using its features.
From online shopping to bill payments and money transfers, JumiaPay simplifies various financial activities, making it a valuable tool for modern living.
Remember to prioritize security and stay informed about the latest features and updates to maximize your JumiaPay experience. This article has shown you how to use the JumiaPay app, empowering you to take control of your mobile payments.
Frequently Asked Questions
1. What should I do if I forget my password?
If you’ve forgotten your password, go to the login page of the JumiaPay app and click on “Forgot Password.” Follow instructions sent to your registered email address to reset it.
2. Can I use multiple bank accounts with my JumiaPay account?
Yes! You can add multiple bank accounts or cards under Payment Settings in your profile section for convenience during transactions.
3. Are there any fees associated with using JumiaPay?
While most transactions are free, some payment methods may incur fees depending on bank policies or specific promotions running at that time.
4. How do I contact customer support if I have issues?
You can reach out through the “Help” section within the app where you can find FAQs or contact customer service directly via chat or email support options provided.
Recommendations
A Beginner’s Guide on How to Use the FairMoney App: Step-by-Step Instructions
How to Use Flutterwave: Everything You Should Know
A Step-by-Step Guide on How to Use the KiaKia Loan App for Beginners


